
When I bought the Raspberry Pi 5 I've remembered that one of the first things I've tried on the first Pi I had (a Raspy 2B) was to have a Minecraft server, but it was buggy and slow. Now the Pi 5 has a lot more power and even NVMe support, so I decided to install a (yes, another) Minecraft server on it, but with something else in mind, make it as portable as possible.
Requirements
These are the requirements to approach this post:
- Raspberry Pi 5.
- MicroSD card or NVMe drive.
- An image burner program like Raspberry Pi Imager.
- A screen like GeekPi 0.96" Oled Display (optional).
Installing Ubuntu
First, we will need to install Ubuntu (or your SO of preference) on the MicroSD card. To do so, we will use Raspberry Pi Imager. I've covered this process before, so go check this post:
If you follow the guide, you'll be able to connect to the Pi from your computer using SSH for more comfort.
Installing Java 21
Now it's time to start the configuration part. Minecraft relies on Java's Runtime, so let's begin with installing it. Connect to the Raspberry using your method of choice, I'll be connecting through SSH using Termius.
Installation steps
As every new installation, I recommend to execute this:
sudo apt update
sudo apt upgrade
After this update, which may take a few, it's time to install the needed dependencies first:
sudo apt install wget apt-transport-https gpg
Then let's add Java's apt repository gpg key and enable it:
wget -qO - https://packages.adoptium.net/artifactory/api/gpg/key/public | gpg --dearmor | sudo tee /etc/apt/trusted.gpg.d/adoptium.gpg > /dev/null
echo "deb https://packages.adoptium.net/artifactory/deb $(awk -F= '/^VERSION_CODENAME/{print$2}' /etc/os-release) main" | sudo tee /etc/apt/sources.list.d/adoptium.list
Lastly, let's update our APT repository and install Java 21:
sudo apt update
sudo apt install temurin-21-jdk
Time to check if it run properly by using this command:
java --verisonTroubleshooting
If it says the following:

Maybe could be due this, It should have appeared earlier in the console:

Let's properly update the raspberry's kernel by typing the following:
sudo apt update
sudo apt install --install-recommends linux-image-raspi
sudo reboot
This should apply the update and also reboot the system to apply it. Now we can try again the command:
java --versionAnd should work just fine!

Minecraft server installation
There are several Minecraft servers, from the official vanilla one, to Spigot or Paper. I prefer Paper, as it's a more optimized fork of Spigot and still maintains the plugin compatibility. For a Raspberry should be a no brainer.
Download Paper
Paper has its own website, where they hold all the versions they have. Go to their website and copy the link by rightclicking on the button:
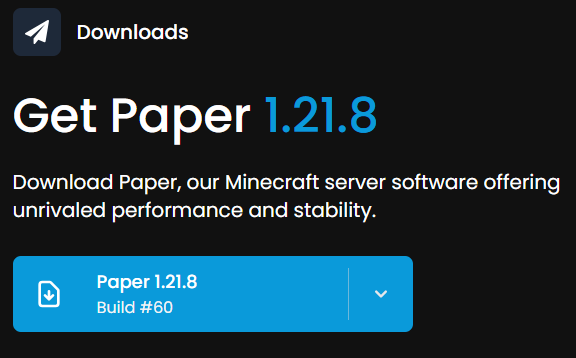
And download it by using wget and the link you obtained, remember to substitute mine with yours!
wget https://fill-data.papermc.io/v1/objects/8de7c52c3b02403503d16fac58003f1efef7dd7a0256786843927fa92ee57f1e/paper-1.21.8-60.jarNow you should have Paper downloaded on your current directory.
Creating the Minecraft Server
Even if this is your only server, I always recommend to have every server properly organized in it's own folder. So let's create a folder to contain all of them and move to it:
mkdir -p ~/minecraft/servers/portable
cd ~/minecraft/servers/portable
Copy Paper inside the folder:
cp ~/paper-1.21.8-60.jar ./And let's start it!
java -jar paper-1.21.8-60.jarFor the first run, you will get an error saying that it failed to load eula.txt. This is normal.
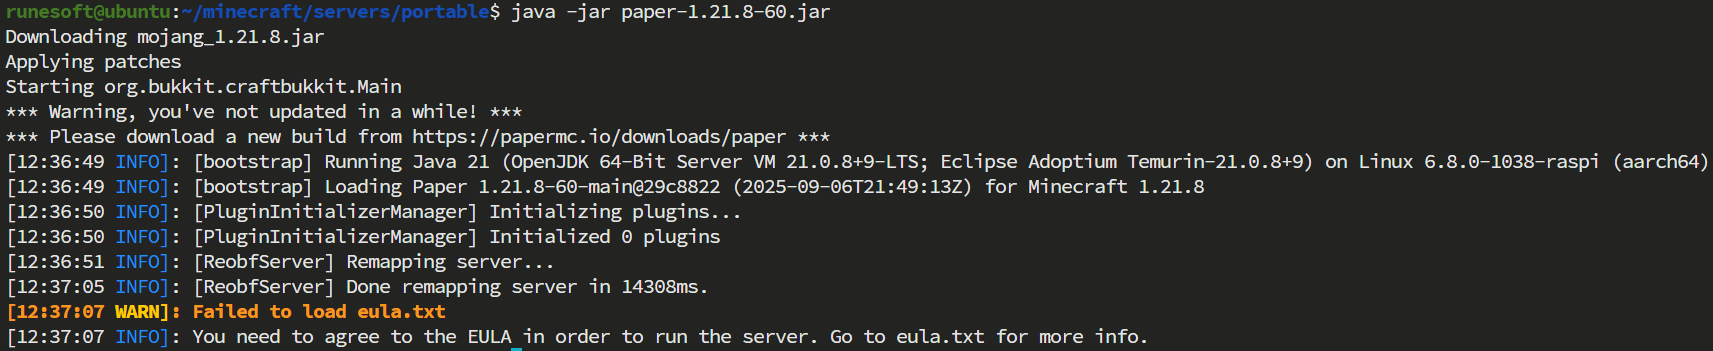
To resolve this, simply accept the EULA by running the following command:
echo "eula=true" > eula.txtAnd now run again!
java -jar paper-1.21.8-60.jarWait a few seconds to generate the world, opening ports, etc. When it finishes, you should be seeing something like this:

Remember to change online-mode to false if the server is not going to have internet connection.
Configuring the server
As you may know, Minecraft has his own configuration file: server.properties, but since we are using Paper, we have more config files:
server.properties: Here you can adjust the difficulty, theoffline-mode, and set the world's seed.bukkit.yml: Since spigot extends from Bukkit, it inherits its configurations.spigot.yml: Sames aplies here to paper, inherited configuration from spigot.paper.yml: Paper specific configuration.
Appart form changing the online mode if you pretend to have the server offline (without internet access), there's nothing special we're doing with the configuration here today.
Configuring server autostart
When you launched the server, the execution locked the console, this means it's linked to this session, once it's closed the server will stop. We don't want that. The server should start automatically and without linking to any sessions. To acomplish this, we are going to create a service.
Create script
Using a bash script for this task is quite easy, this script will be just calling the command we used to launch our server. But first, let's see two important parameters:
-Xms: Establish the minimum memory amount for the server.-Xmx: Establish the maximum memory amount for the server.
With this in mind, create the file:
nano ~/minecraft/servers/portable/server-start.shAnd fill it with the following, adapting the memory usage to your needs:
!/bin/bash
java -jar -Xms1024M -Xmx2048M paper-1.21.8-60.jar
Then save with ctrl + o and exit with ctrl + x and add execution permissions to this file
chmod +x ~/minecraft/servers/portable/server-start.shNow we have the needed script, just time to create the service.
Create service
A service allows us to execute the usual start, stop, status commands over the created task. It also lets us enable autostart, so let's create the file:
sudo nano /etc/systemd/system/portable-minecraft.serviceAnd put the following content
[Unit]
Description=SpigotServer
After=network.target

[Service]
Type=simple
User=runesoft
Restart=always
RestartSec=1
WorkingDirectory=/home/runesoft/minecraft/servers/portable
ExecStart=bash /home/runesoft/minecraft/servers/portable/server-start.sh

[Install]
WantedBy=multi-user.target
Now let's enable to autostart and run it by:
sudo systemctl enable portable-minecraft.service
sudo service portable-minecraft start
If you wait a bit, now you'll be able to execute the status service comand:
sudo service portable-minecraft statusAnd see the logs saying the server is up and runing!

Connecting to the server
Now that we have our server up and runing, with the latest Minecraft version, is time to check it by connecting our Miencraft client. If the Raspberry Pi is connected to your local network, you can get the IP if you dind't have it already by typing:
ip aTake note of the given IP address, go to your PC, run Minecraft at the latest version and add a new server:
Then the server should be up and you can join to it!

Private WiFi Network
I wanted to be able to connect to the Minecraft Server even when the Raspberry Pi is not connected to the same network, so we can go wherever we want, plug the server and play. To do so, I've decided to create a private WiFi network using the Raspberry, so players can join that network and play even without connencting the cable or having internet connection.
To enable the wifi we need a NetPlan:
sudo nano /etc/netplan/10-my-config.yaml And insert the following content.
network:
  version: 2
  renderer: NetworkManager
  ethernets:
    eth0:
      dhcp4: true
      optional: true
  wifis:
    wlan0:
      dhcp4: true
      optional: true
      addresses:
        - 10.42.0.1/24
      access-points:
        "Runesoft Minecraft": # Change to your preference
          password: "yourpasswordgoeshere" # Change to your preference
          mode: ap
Disable the cloud init plan:
sudo bash -c "echo 'network: {config: disabled}' > /etc/cloud/cloud.cfg.d/99-disable-network-config.cfg"Apply the custom netplan:
sudo netplan generate
sudo netplan apply
And a new WiFi called Runesof Minecraft (or the name you picked) will appear:
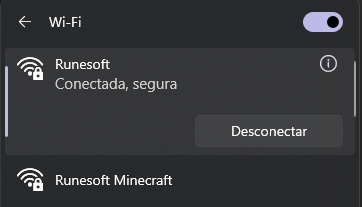
Testing connection to server with wifi
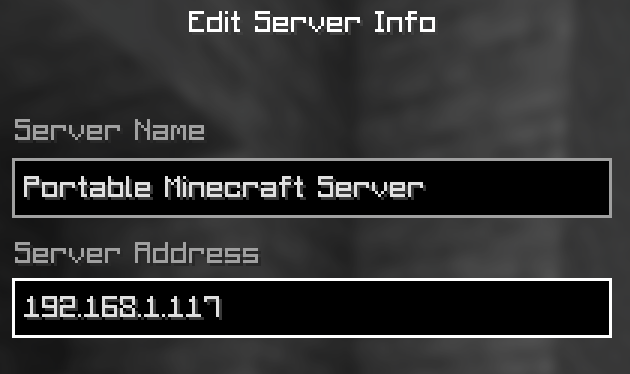
Just try to connect to it using the configured password. The Raspberry will act as a "router". Now let's change the IP of the server added to our Minecraft before:
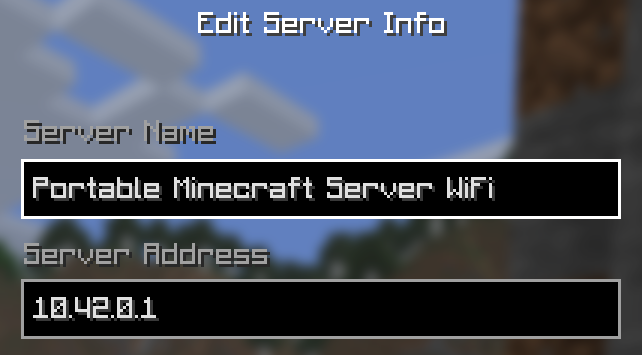
Save the server info and refresh. It should still be up and running, letting you join!

If the server says you that the account servers are offline, this should be because it's in online mode, and the Raspberry Pi doesn't have internet conection, so:
Remember to changeonline-modetofalseif the server is not going to have internet connection.
Custom Screen
All this part is totally optional, but I've found it pretty useful since we want the server to be as portable and automatic as possible, and with this screen we can show the server IP and status, so we don't have to connect to it in any way or remember the IP to get the needed data to play Minecraft on it.
Physical installation
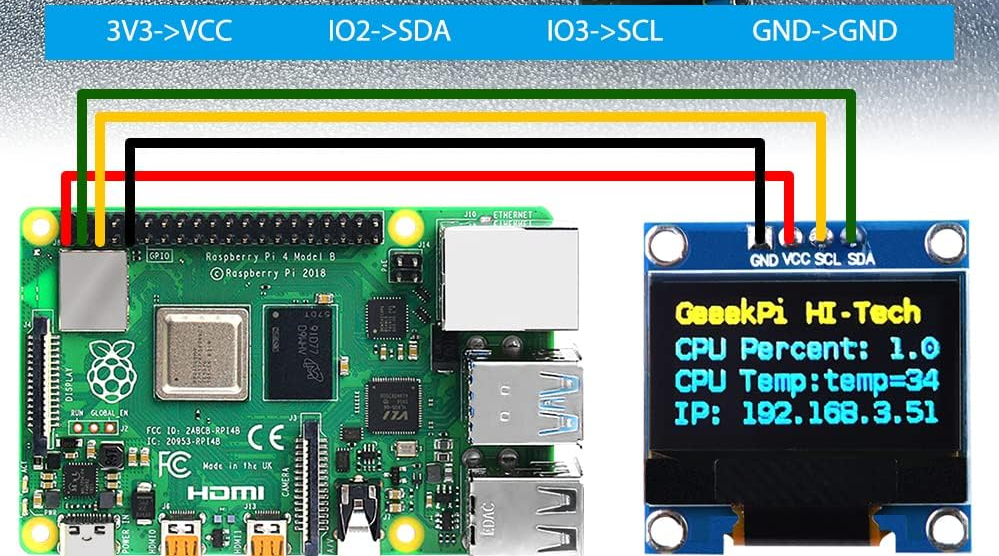
Following the provided guide received with the screen package, connect the pins to the corresponding ones at Pi's GPIO.
Install Python and libs
This screen repository relays on Python and some libs, so let's download them:
sudo apt install python3 python3-pip python3-pil libjpeg-dev zlib1g-dev libfreetype6-dev liblcms2-dev libopenjp2-7 libtiff5 fonts-dejavuTime to give our user permissions to access the GPIO connectors:
sudo usermod -a -G gpio,i2c runesoftRemember to change the user "runesoft" with yours.
Download repository
In my case, following the screen installation instructions, they provide a Github repository which I'll be cloning and applying changes on it. So lets begin:
git clone https://github.com/rm-hull/luma.examples.gitMove to the cloned folder and execute:
sudo pip install psutil --break-sytem-packages
sudo -H pip3 install -e . --break-sytem-packages
Custom Script for screen data
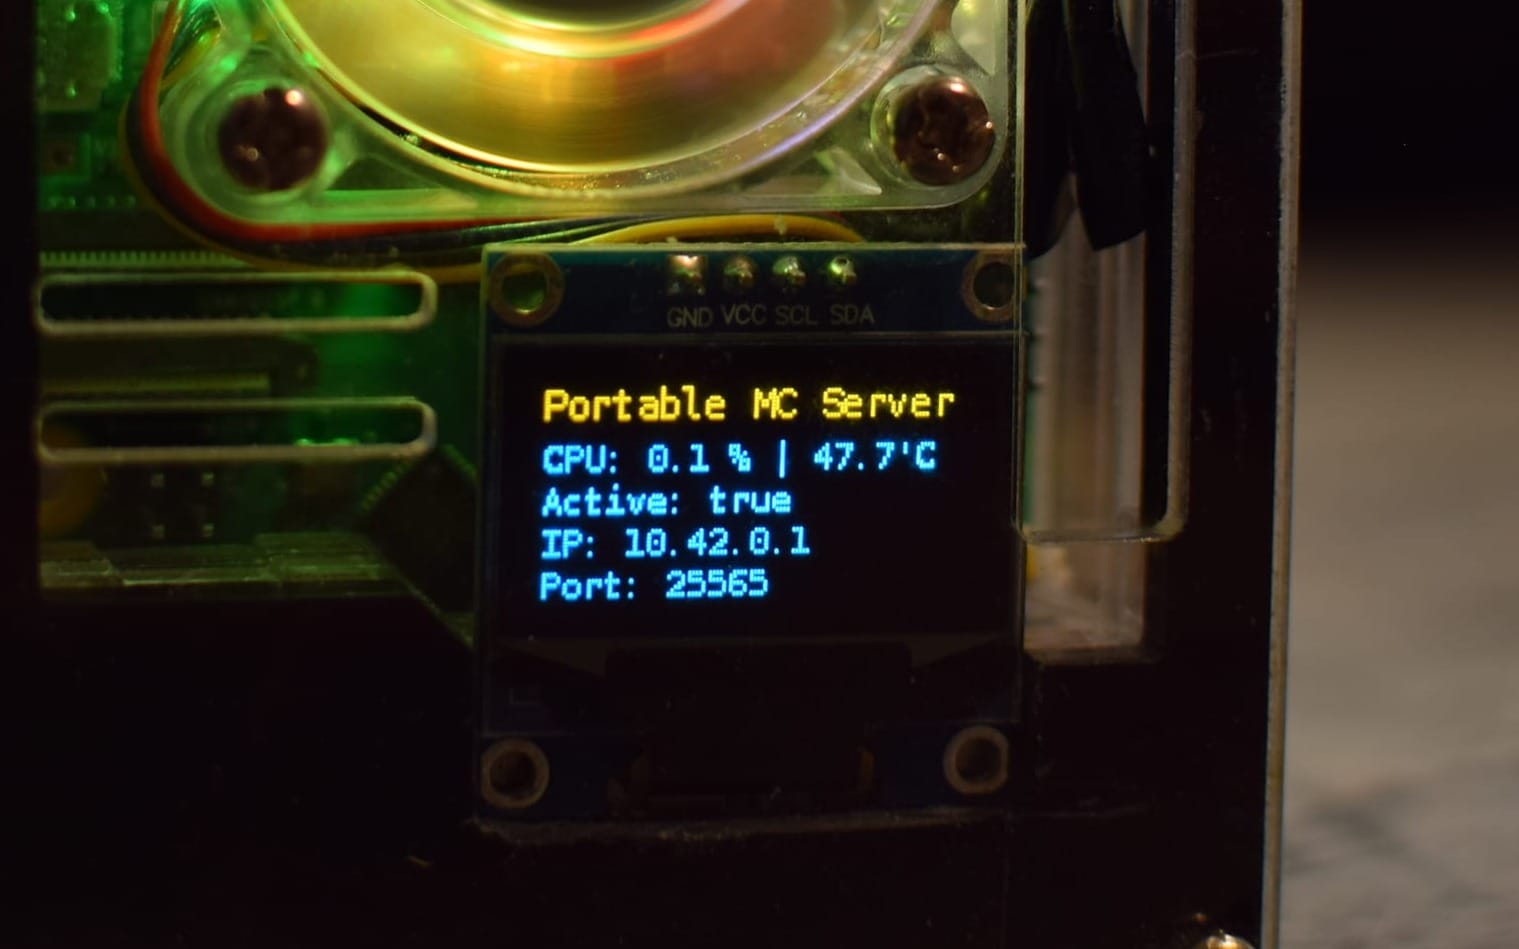
Using the provided demo in the repository, I've made some changes, ending up with the following Python script to setup the screen data. This script displays the following:
- A name: Configurable name/banner.
- CPU usage and temperature: In Celsius.
- Minecraft container status: Active/Stopped.
- IP assigned: If there's more than one, it changes every 5 seconds to show the others.
- Port: The port configured for the server.
So let's create our own:
nano ~/luma.examples/examples/custom-screen.pyAnd fill it with this script:
#!/usr/bin/python3

import time
from demo_opts import get_device
from luma.core.render import canvas
from PIL import ImageFont
import psutil
import subprocess as sp
import json

class Globals():
    _timelapse = 5
    _titleHeight = 14
    _textHeight = 12

    _ipCounter = 0
    def addIpCounter(self):
        self._ipCounter += 1
    def getIpCounter(self):
        return self._ipCounter
    def resetIpCounter(self):
        self._ipCounter = 0

globals = Globals()

def set_timelapse(data):
    globals._timelapse = data['timelapse']

def get_title(data):
    return data['title']

def get_line(data, line_number):
    return data['lines'][line_number]['text']

def get_temp():
    temp = sp.getoutput("vcgencmd measure_temp").split("=")[1]
    return temp

def get_cpu():
    cpu_percent = psutil.cpu_percent(interval=2)
    return "CPU: %.1f" % (cpu_percent) + " % | " + get_temp()

def get_minecraft_status():
    status = sp.getoutput("service portable-minecraft status | grep Active:")
    if "active (running)" in status:
        status = "Running"
    else:
        status = "Stopped"
    return "Active: %s" % (status)

def get_minecraft_port():
    pid = sp.getoutput("pidof java")
    port = sp.getoutput("lsof -i -Pan -p %s -n | grep LISTEN" % (pid))
    if port == "":
        port = "Not Running"
    else:
        port = port.split(":")[1]
    return "Port: %s" % (port)

def get_cpu_count():
    cpu_count = psutil.cpu_count()
    return "CPU Count: %s" % (cpu_count)

def get_ip():
    ipList = sp.getoutput("hostname -I").split(" ")
    if globals.getIpCounter() > len(ipList) - 2:
        globals.resetIpCounter()
    ip = ipList[globals.getIpCounter()]
    globals.addIpCounter()
    return "IP: %s" % ip

def findPlaceholders(text):
    if text == '$IP':
        return get_ip()
    if text == '$MC_STATUS':
        return get_minecraft_status()
    if text == '$MC_PORT':
        return get_minecraft_port()
    if text == '$CPU_DATA':
        return get_cpu()
    return text

def stats(device):
    file = open("/home/runesoft/luma.examples/examples/custom-display-text.json")
    data = json.load(file)
    set_timelapse(data)
    font_path = '/usr/share/fonts/truetype/dejavu/DejaVuSansMono.ttf'
    title_font = ImageFont.truetype(font_path, 11)
    font_size = ImageFont.truetype(font_path, 10)
    separator = 0

    with canvas(device) as draw:
        draw.text((0, separator), findPlaceholders(get_title(data)), font=title_font, fill="white")
        separator += globals._titleHeight
        draw.text((0, separator), findPlaceholders(get_line(data, 0)), font=font_size, fill="white")
        separator += globals._textHeight
        draw.text((0, separator), findPlaceholders(get_line(data, 1)), font=font_size, fill="white")
        separator += globals._textHeight
        draw.text((0, separator), findPlaceholders(get_line(data, 2)), font=font_size, fill="white")
        separator += globals._textHeight
        draw.text((0, separator), findPlaceholders(get_line(data, 3)), font=font_size, fill="green")

    file.close()

device = get_device()

while True:
    stats(device)
    time.sleep(globals._timelapse)
Before running it, I've created a configuration JSON, so we can change the lines more easily, so also create the following file:
nano ~/luma.examples/examples/custom-display-text.jsonAnd then add this content:
{
    "timelapse": 5,
    "title": "Portable MC Server",
    "lines": [
        {
            "text": "$CPU_DATA"
        },
        {
            "text": "$MC_STATUS"
        },
        {
            "text": "$IP"
        },
        {
            "text": "$MC_PORT"
        }
    ]
}
Here you can change the following:
- timelapse: The seconds between each refresh of the screen.
- title: The title on the screen.
- lines: In this screens fits 4 lines, you can use the provided placeholders, or create your owns, or just use plain text.
Configure screen service
Now let's create a service for our script to launch on start so our data are visible on boot without connecting to the Raspberry. Create a bash file which will launch our Python file to begin with:
nano ~/screen-start.shWith the following content
#!bin/bash
/usr/bin/python3 /home/runesoft/luma.examples/examples/custom-screen.py
Then, create the service file:
sudo nano /etc/systemd/system/custom-screen.serviceWith the following content:
[Unit]
Description=Custom Screen Service
After=multi-user.target

[Service]
User=runesoft
Type=simple
WorkingDirectory=/home/runesoft/luma.examples/examples
ExecStart=/bin/bash /home/runesoft/screen-start.sh
Restart=always

[Install]
WantedBy=multi-user.target
Finally, enable and reload the systemd services:
sudo systemctl enable custom-screen.service
sudo service custom-screen start
With all these steps done, the screen should show us the info we want:
Conclusion
Now we have a Raspberry Pi with an auto started containerized Minecraft Server and an optionally display to get the needed info. Just plug it to an USB-C charger or even a Powerbank and you're ready to go!
