I already have a guide for this, but its quite old since nowadays, installing Ubuntu on Raspberry Pi is much easier than before. Raspberrys official tool Raspberry Pi Imager simplifies the process a lot.
So I've decided to create this new one!
Writting the image to the boot device
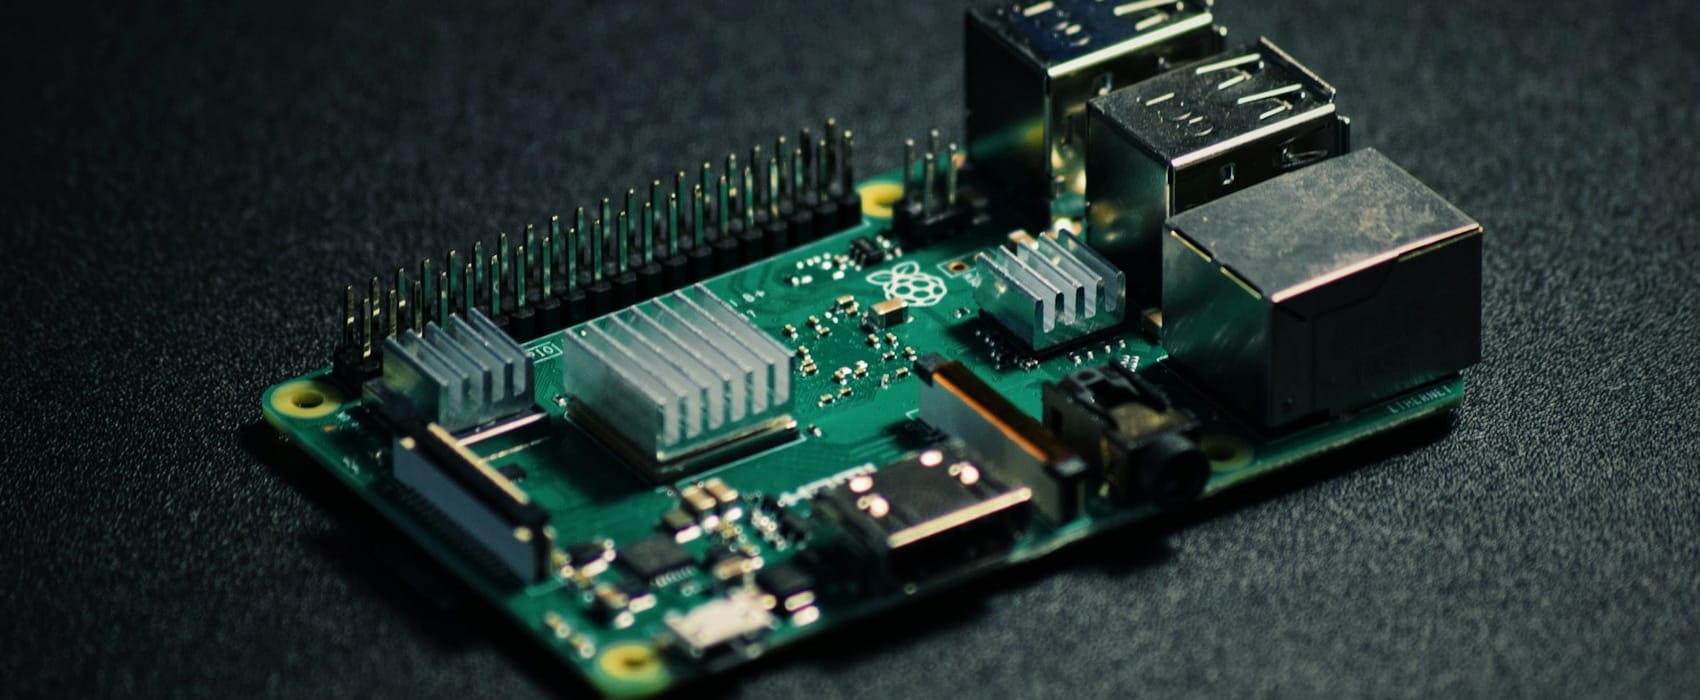
The Raspberry Pi usually uses an SD card to boot up, nowadays you can even use an NVMe disk. But the process is the same: Burning the OS image to the device.
The difference between this process, and a default OS installation (like windows or linux in a PC) is that the OS is fully written by other host. This process is called image burning, because it was used on DVDs and disks.
If you want to use a NVMe drive, be shure to get an adapter like an external NVMe case, to be able to insert it to your main computer to burn the OS. Same aplies to the SD card, but them usually comes with an USB adapter.
Burning process
For this case, we will use the official Raspberry Pi tool mentioned at the begining: Raspberry Pi Imager. Download and istall it to begin with, and when launching it, this screen should appear.
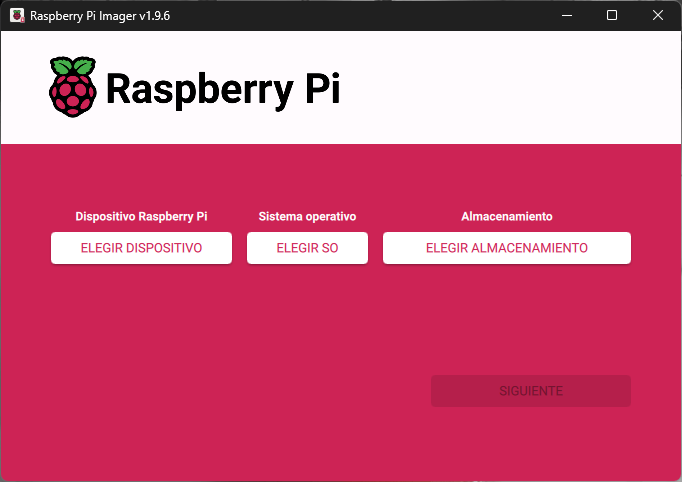
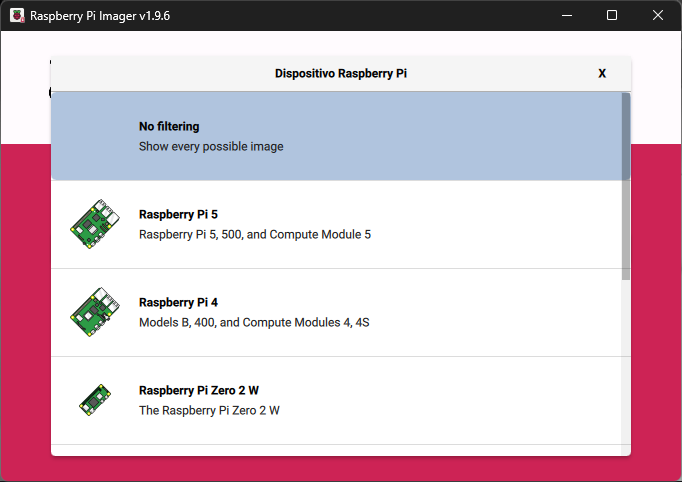
There, we must start by choosing our device, in my case, the Raspberry Pi 5.
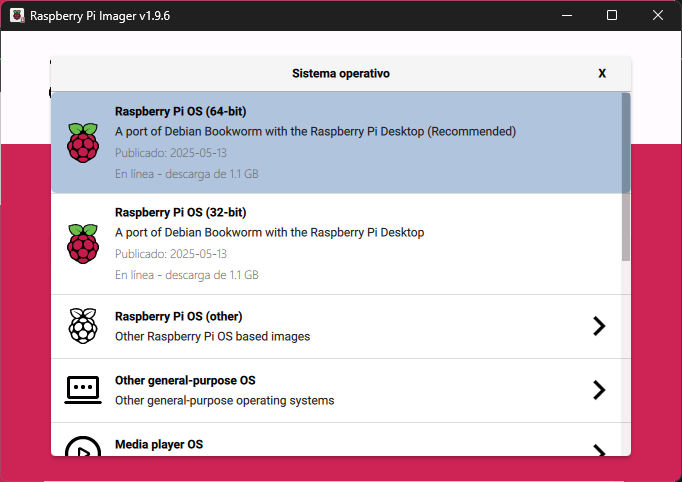
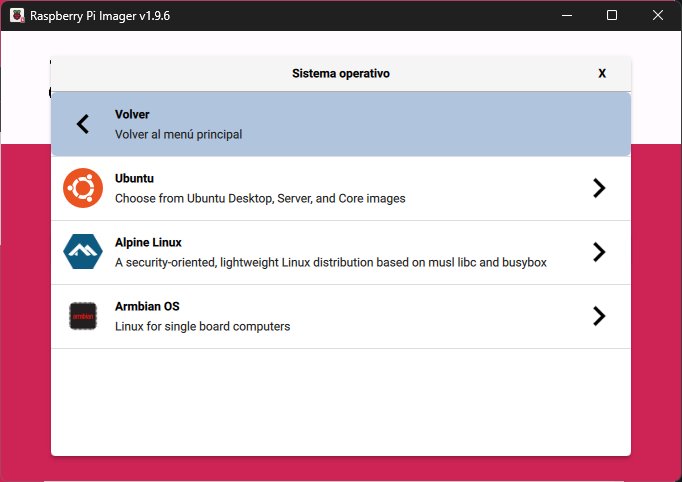
Then, is time to choose the operating system. On this menú, Raspberry Pi OS shows first, but, we pick the option of Other general-purpose OS below.
Then, Ubuntu shows up, click on it to se all the available options.
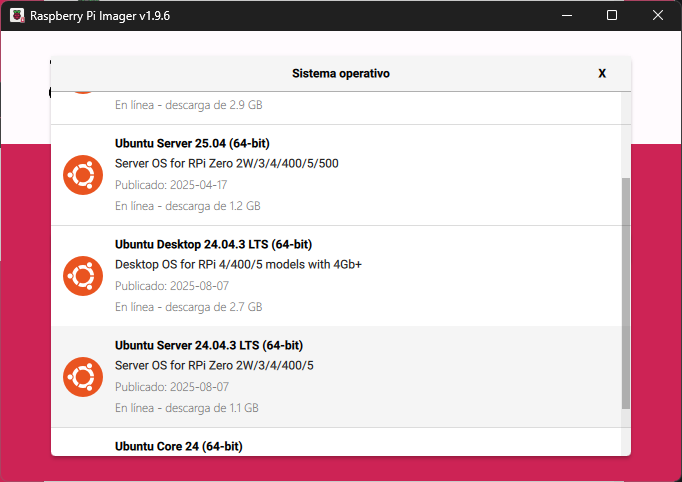
And here, I recommend to always install the latest LTS version, at this time it's the Ubuntu Server 24.04.3 LTS 64bit version.
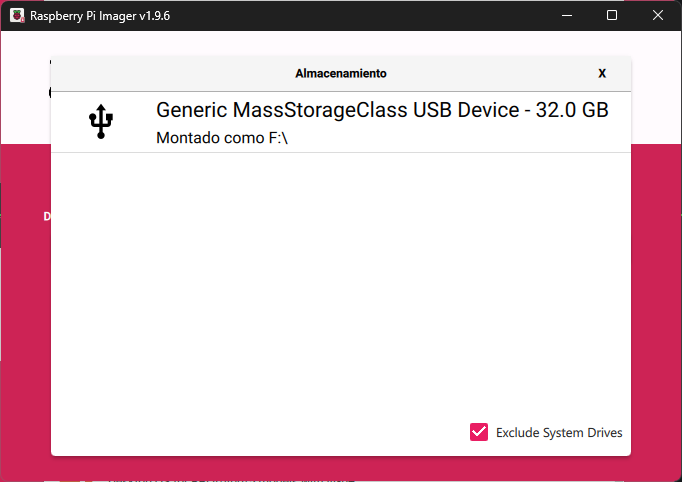
Now, just pick the devide where to burn the OS.
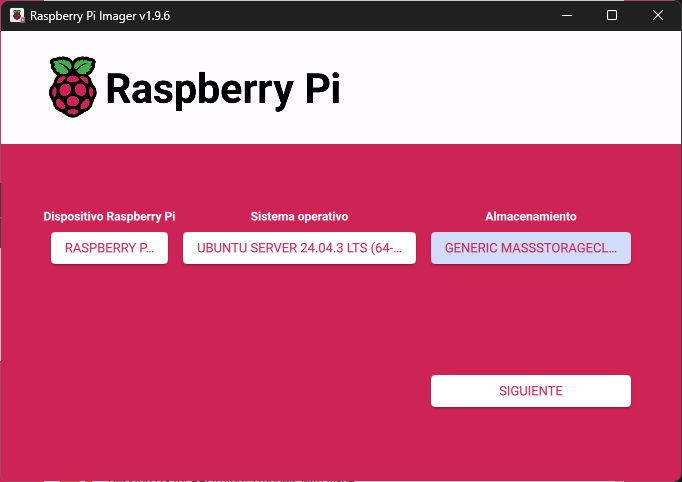
An click next to proceed.
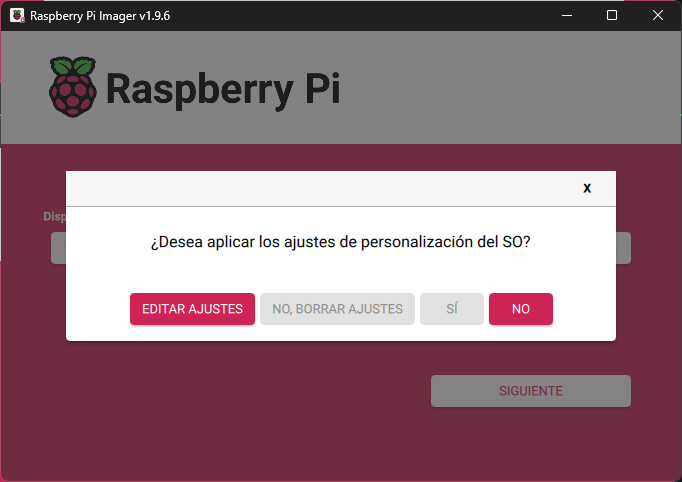
A popup will appear. It will ask you to apply (or not) the OS customization options. Here I recomend to click on Edit Options.
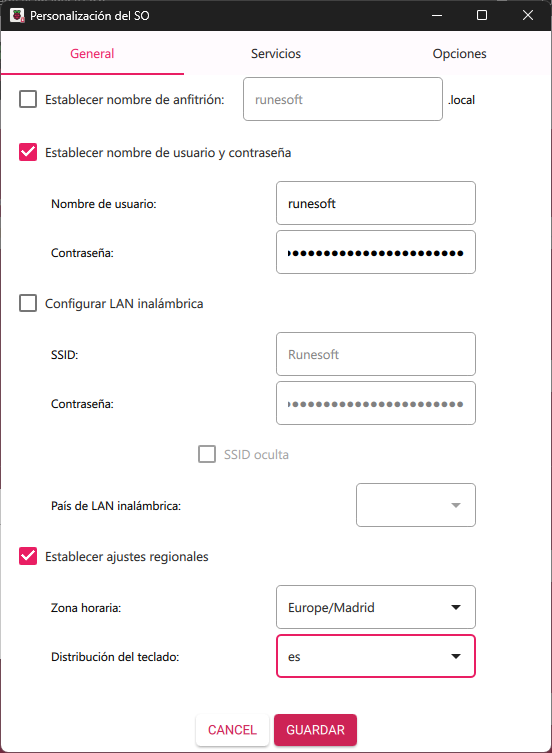
The General tab allows us to configure things like the host name, default user and password, the wireless lan configuration and the regional options. Fill it up as you need.
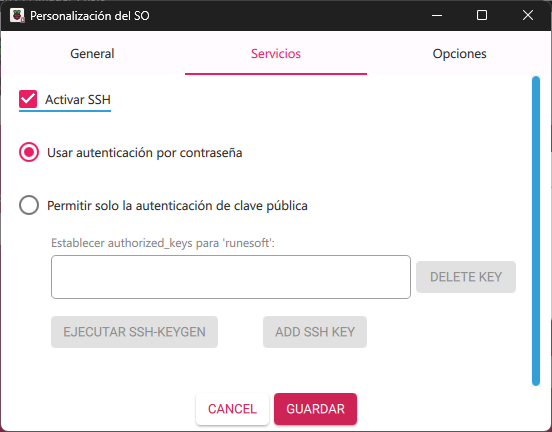
At the Services tabs, we are allowed to toggle SSH service ON by default, using user and password to authenticate.
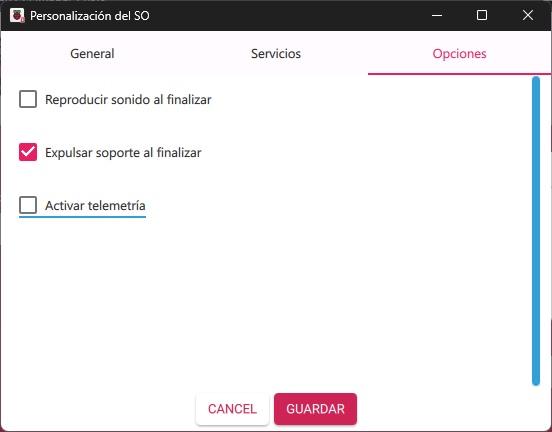
And lastly, at the Options tab, I recommend to toggle off the Telemetry option.
Then click on Save and accept the following message asking for confirmation.
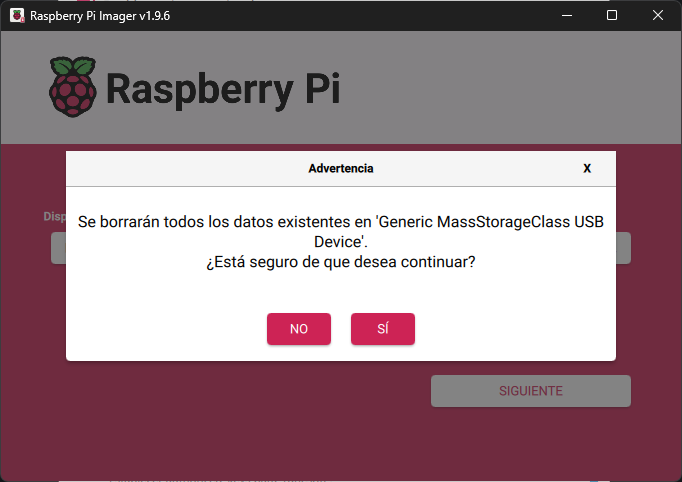
When the process finishes, It should show up a message like this one below, telling us that the image is writted to the selected device, and you can take it off.

Booting up the raspberry
Time to check the installation. To do so, insert the SD card (or the NVMe drive) to the Raspberry Pi, and boot it up. Then, we have two options:
- Use SSH to connect.
- Pulg the Raspberry to a monitor.
Using SSH
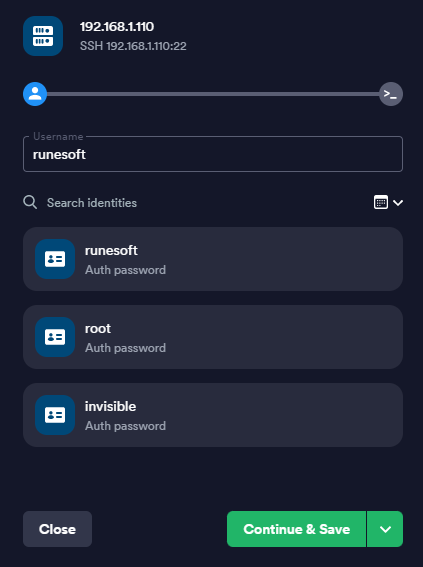
If you choose to have the SSH server configured by default, and your custom user, you can avoid using a screen, and just connect with a terminal. First, we should know the IP address, this can be achieved by acessing to your router or by a network scan. Once you got it, use your favourite terminal, I'll be using Termius. So lets add a new host with the IP and connect:
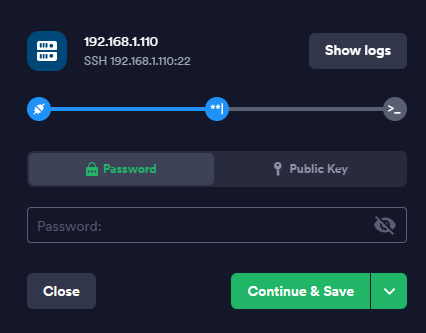
Then type the password.
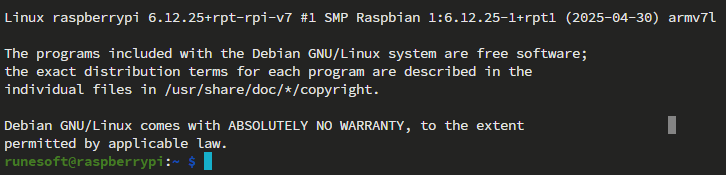
And youre in using SSH! Now you can use it like using a montior, keyboard and mouse, since is a no GUI installation.
With screen:
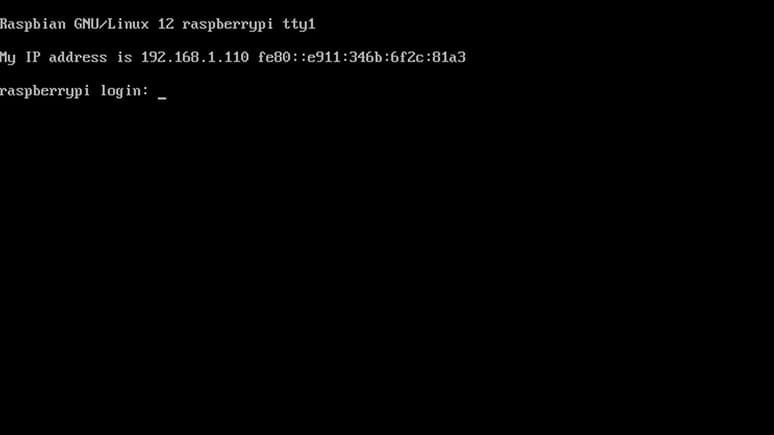
For this mode, you will need at least a monitor. Just plug the raspberry to it and wait for it to boot.
In a few seconds you should be seeing Ubuntu's login prompt, like any other Ubuntu install
Conclusion
Now we have a properly installed Ubuntu in our Raspberry Pi, allowing us to create any type of server, like Apache, NodeJS, Docker containers, Kubernetes and, of course, even Minecraft servers!
Hope you found this guide usefull, and don't forget to ask in the comments any doubts!
