When deploying applications, from small scale to even larger ones, Kubernetes enters the game. Today, we will install and configure a simple dashboard to control our Kubernetes cluster made with K3s, a lightweigh kubernetes distro.
Requirements
To achieve this post, we will be using the following:
- A Raspberry Pi 5 (16GB RAM version here).
- An NVMe with the corresponding adapter.
- Ubuntu 24 LTS installed.
If you don't have Ubuntu 24 installed on your raspberry, you can follow this guide!
Installing K3s
This step is quite easy nowadays. K3s provides a bash script that will do all the work, we just need to follow the official guide steps. I'll simplify them here.
Let's execute the mentioned script:
curl -sfL https://get.k3s.io | sh -After running this installation:
- The K3s service will be configured to automatically restart after node reboots or if the process crashes or is killed.
- Additional utilities will be installed, including
kubectl,crictl,ctr,k3s-killall.sh, andk3s-uninstall.sh - A kubeconfig file will be written to
/etc/rancher/k3s/k3s.yamland the kubectl installed by K3s will automatically use it.
Enabling kubectl command for our user
By default, the config is only readable by admin users. For easy use, we will create a copy for our user, allowing us to use the kubectl command withou using sudo.
First, create a hidden folder for kubernetes:
mkdir ~/.kubeNow, let's copy kubernete's file to that folder and change its owner to your user and group:
sudo cp /etc/rancher/k3s/k3s.yaml ~/.kube/k3s-personal.yaml
sudo chown $(id -un):$(id -gn) ~/.kube/k3s-personal.yaml
And let's create an enviroment variable to hold the new config file. To do so, execute this command, it will add the env to your user's .bashrc file and reload it.
echo -e "\n# kubectl comand for user $(id -un):\nexport KUBECONFIG=$HOME/.kube/k3s-personal.yaml\n" >> ~/.bashrc
source ~/.bashrc
Checking installation
Now, you can check if K3s is working by executing this command:
kubectl get nodesIt should give an output like this:
NAME              STATUS   ROLES                  AGE   VERSION
runesoft-k3s-01   Ready    control-plane,master   56m   v1.33.5+k3s1
Now you have K3s up and running!
Installing Portainer
For easy use of the K3s installation, sometimes is handy to have a UI to administrate the cluster. For now I'll be using Portainer, since I've used it on my Docker Swarm.
Portainer docs are quite simple and self explanatory, you can check them here. I've simplify them. We will need to add Portainer's repo to helm:
helm repo add portainer https://portainer.github.io/k8s/
helm repo update
Then let's install Portainer. With the following command, we will be creating a new namespace named portainer, where we will be installing portainer image from the repo configured above. Just execute:
helm upgrade --install --create-namespace -n portainer portainer portainer/portainer \
    --set tls.force=true \
    --set image.tag=lts
Now it's time to deploy Portainer itslef, by executing this command, a new container will be deployed in our K3s cluster using the image and namespace installed before.
kubectl apply -n portainer -f https://downloads.portainer.io/ce-lts/portainer.yamlTo check if the container is running, type:
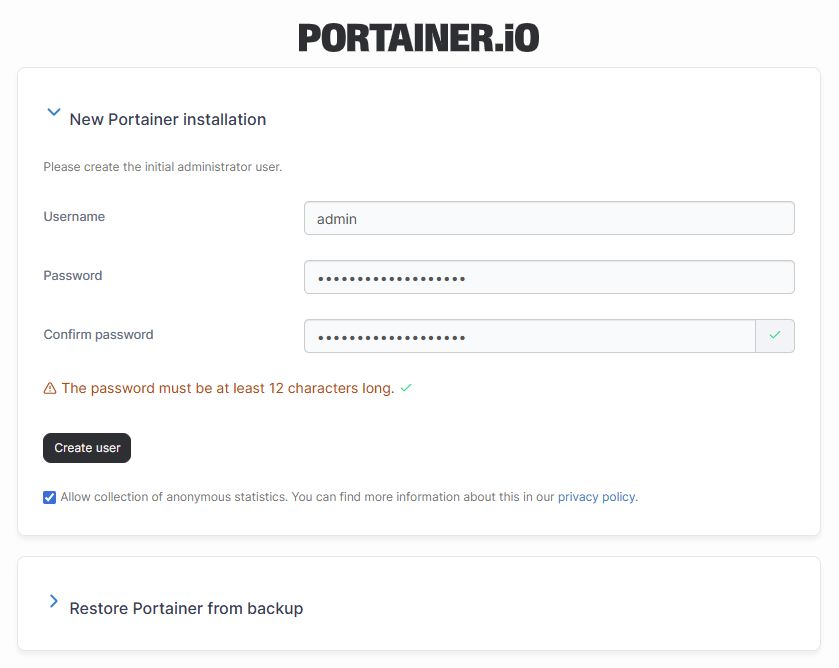
kubectl get pods -n portainerAnd vistit your new interface at https://<your_server_ip>:30779. It should ask you for a username and password for the administrator account. Once you filled it up, click on Create user.
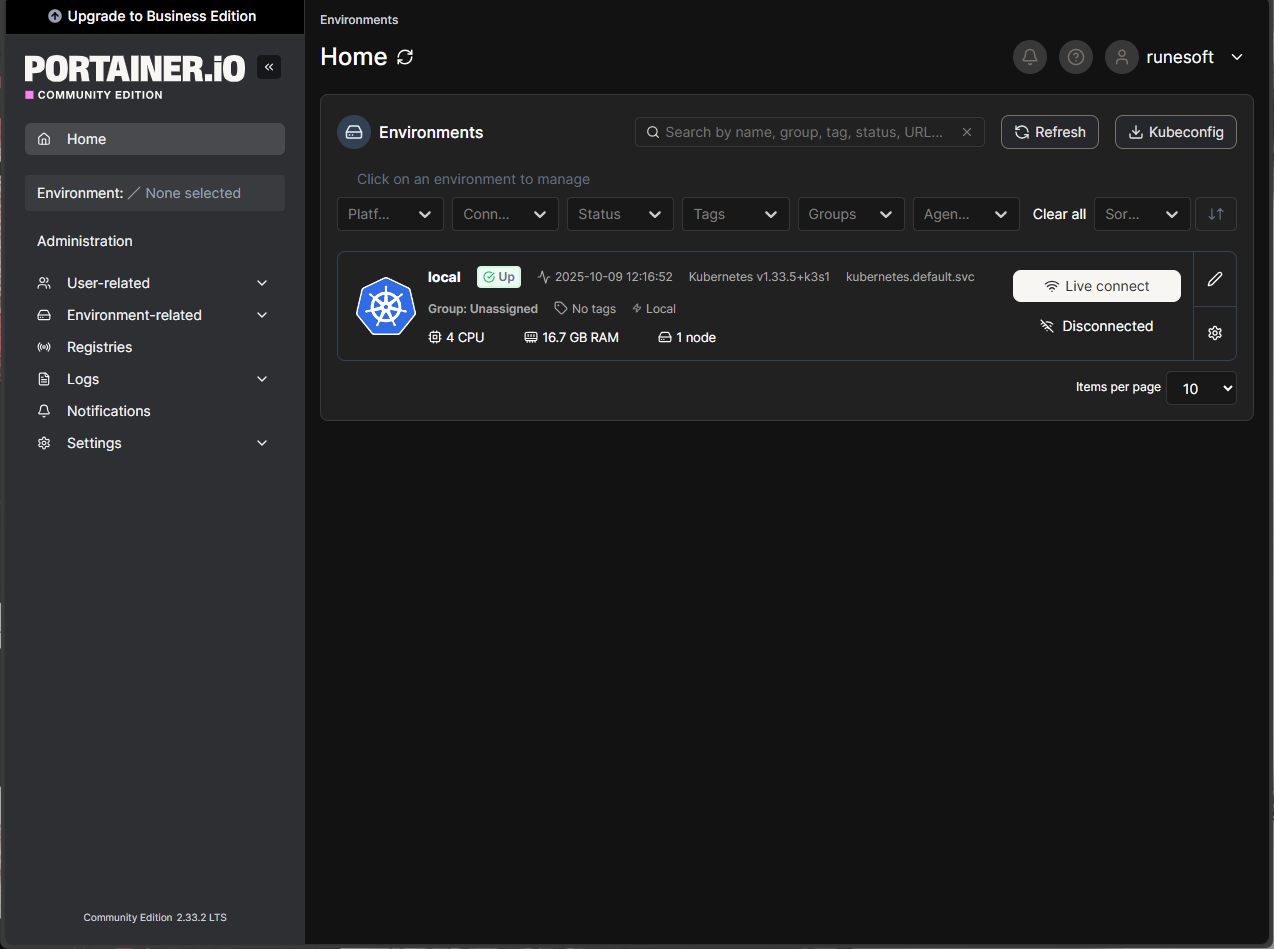
And after login, you can view Portainer's home page!